Why Baseboards Are a Great Upgrade For Your Home and How To Install Them.
Installing your own baseboards is a very doable DIY project that can dramatically clean up the look of a room while saving quite a bit on labor. The following should give you a clear idea of what the job will involve. Of course, if you want to improve the look and increase the value of your home by adding or replacing baseboards and you don’t want to do it yourself Edwards Enterprises is here to help.
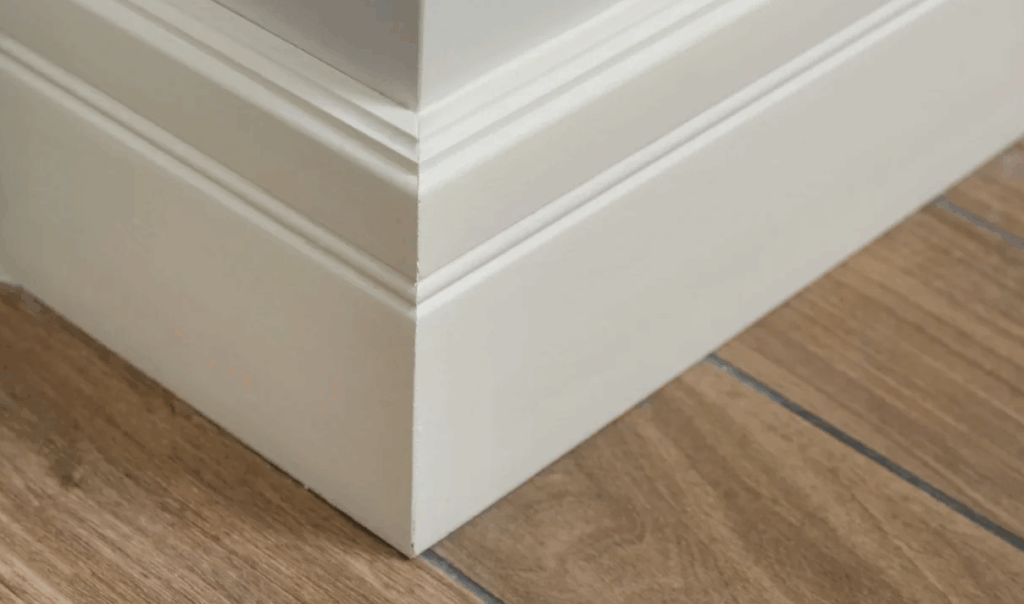
Why Baseboards Matter
Baseboards do a lot more than decorate the bottom of your walls. They:
- Cover the gap between wall and floor so the transition looks clean and intentional, not rough or unfinished.handymanconnection+1
- Protect drywall and paint from vacuums, mops, shoes, kids’ toys, and furniture bumps.jbrownpainting+2
- Help block small drafts and reduce dust and debris entering from gaps at the bottom of the wall.kofflersales+2
- Make cleaning easier by preventing dirt buildup in cracks and giving you a solid edge to run a vacuum or mop against.jbrownpainting+1
- Add architectural character and help tie together flooring, wall color, and door/window trim so the room looks finished.clarksmouldinganddoor+2
Why Do It Yourself?
Installing baseboards is one of the more beginner‑friendly trim projects, especially in rectangular rooms.
Benefits of DIY:
- Significant labor savings compared with hiring a finish carpenter or handyman.compositecarpentry+1
- Full control over style, height, and paint/stain, which is great if you’re trying to match or upgrade older trim.lowes+1
- A skill you’ll reuse for casing doors/windows and other mouldings.thriftdiving+1
- You can work room by room on weekends instead of scheduling a contractor.compositecarpentry+1
Caveats:
- You must be comfortable measuring accurately and cutting miters.homedepot+1
- You’ll need some tools (or to rent them), especially a miter saw and nailer.angi+2
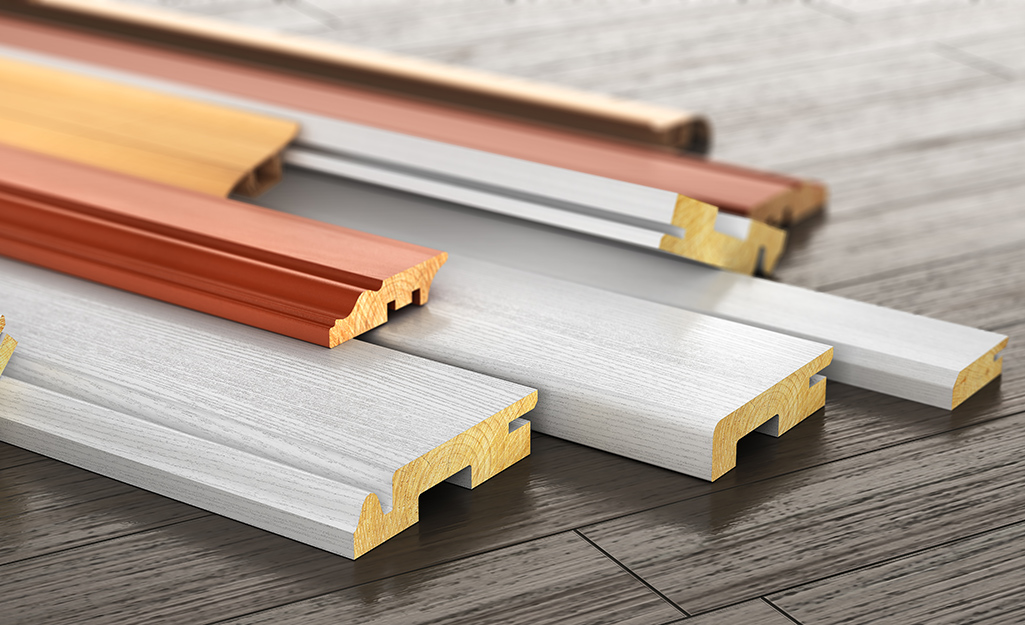
Common Baseboard Options
Here are typical options you’ll see at Home Depot, Lowe’s, or local lumber yards.homedepot+2
| Type | Pros | Cons | Typical Use |
|---|---|---|---|
| MDF primed baseboard | Smooth, inexpensive, comes pre‑primed and ready to paint; very common. [lowes] | Can swell with moisture; not ideal for bathrooms unless well sealed. jbrownpainting+1 | Whole‑house trim in dry areas. |
| Finger‑jointed pine (primed) | Real wood, paint‑grade, more durable than MDF, still affordable. [lowes] | Visible joints if paint job is poor; still not ideal for very wet areas. [jbrownpainting] | Most living spaces, halls, bedrooms. |
| Solid wood (pine, oak, etc.) | Stainable, durable, classic look; good for higher‑end finishes. [clarksmouldinganddoor] | More expensive, can move with humidity (expansion/contraction). [handymanconnection] | High‑end homes, stain‑grade projects. |
| PVC / vinyl baseboard | Moisture‑proof, great for baths, basements, and laundry rooms; can be painted. jbrownpainting+2 | Slightly plastic look if not painted; can be pricier than MDF. kofflersales+1 | Bathrooms, kitchens, basements. |
| Rubber / vinyl wall base (commercial) | Flexible, very durable, good for uneven walls, often peel‑and‑stick or glued. [kofflersales] | More “commercial” look, usually not used in traditional living spaces. [kofflersales] | Garages, utility rooms, commercial spaces. |
Typical profiles include simple square edge, colonial, contemporary flat, and more ornate stepped or ogee shapes.clarksmouldinganddoor+1
Examples of products (search these or similar at your preferred retailer):
- “MDF primed 3‑1/4 in. colonial baseboard” – common, budget‑friendly paint‑grade.[lowes]
- “PVC waterproof baseboard moulding 3‑1/4 in.” – for baths and laundry rooms.kofflersales+2
- “Finger jointed pine baseboard 5‑1/4 in. primed” – taller, more upscale look.[lowes]
Tools and Materials You’ll Need
You don’t need every fancy tool, but the following will make the job smoother.thriftdiving+4
Materials
- Baseboard moulding (add 10–15% extra for waste).angi+1
- Paint or stain and primer if needed (many baseboards are pre‑primed).homedepot+1
- Construction adhesive (optional but helpful, especially on wavy walls).[angi]
- Finish nails or brad nails, typically 1.5–2 in. for drywall over studs.compositecarpentry+2
- Wood filler or putty for nail holes and small gaps.thriftdiving+1
- Paintable caulk to seal top edges and corner joints.handymanconnection+2
Tools
- Tape measure and pencil.compositecarpentry+2
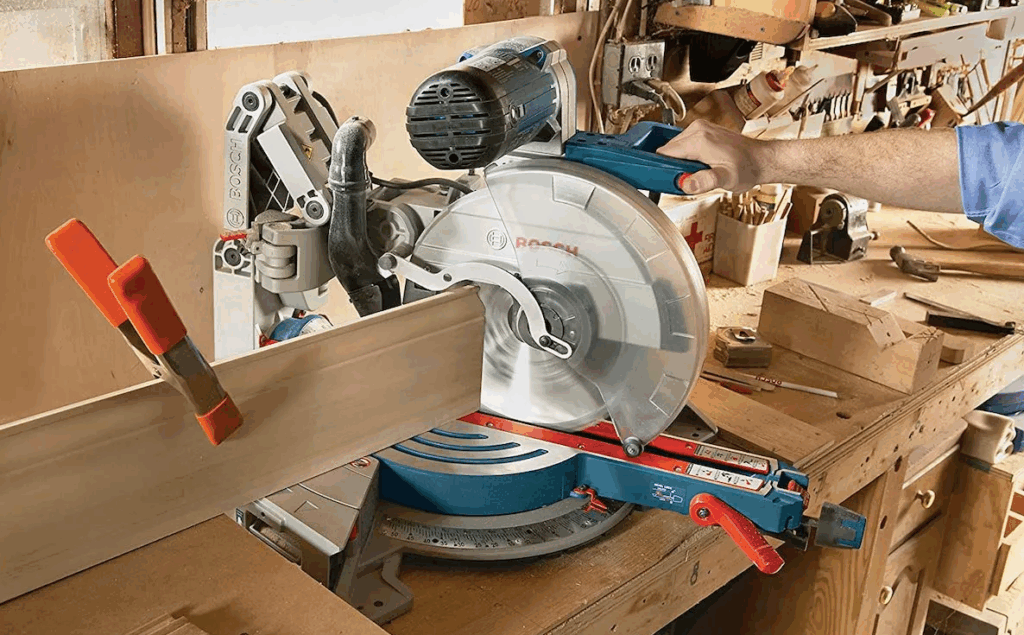
- Miter saw for accurate angle cuts; a miter box and hand saw can work in a pinch.homedepot+2
- Coping saw for inside corners if you want pro‑level, crack‑resistant joints.lowes+1
- Nail gun (18‑gauge brad nailer or 16‑gauge finish nailer) and air compressor, or a cordless finish nailer; hammer and nail set as a manual alternative.thriftdiving+3
- Stud finder and level.angi+2
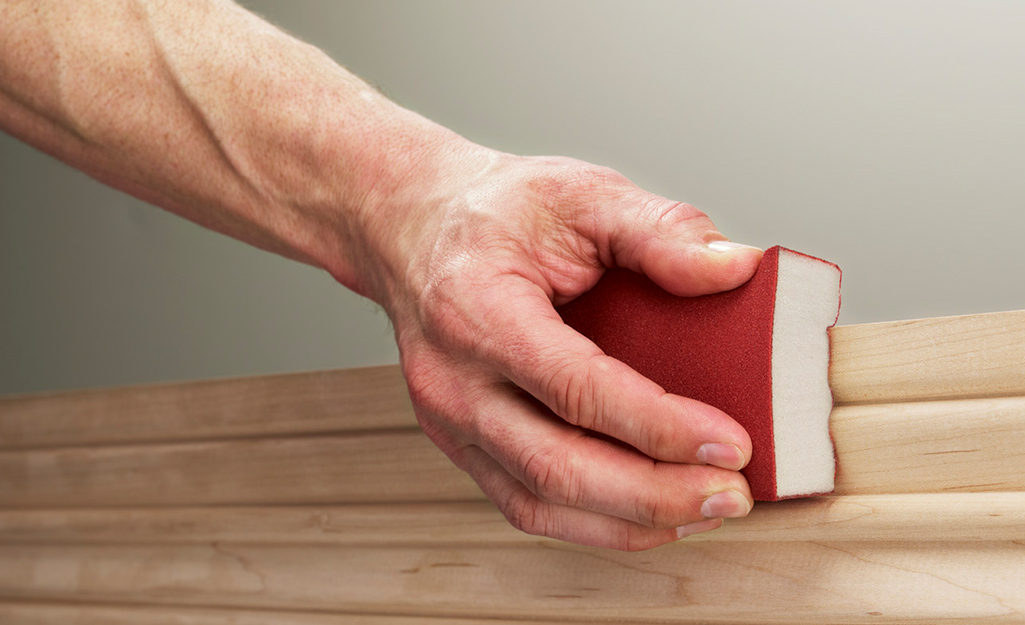
- Sandpaper or sanding sponge (120–220 grit).[homedepot]
- Caulk gun.compositecarpentry+2
- Safety glasses and hearing protection.compositecarpentry+1
Typical product types to look for:
- “18‑gauge cordless brad nailer kit” for fastening.thriftdiving+2
- “10 in. compound miter saw” for clean miters.homedepot+1
- “Latex paintable caulk” for finishing seams.jbrownpainting+2
Step‑by‑Step Guide: Installing Baseboards
This sequence assumes painted baseboard over drywall with either hardwood, tile, or carpet.
1. Plan and Measure
- Sketch the room and label each wall, including doorways and outside corners.[thriftdiving]
- Measure each wall to the nearest 1/16 in. and record it on your sketch.homedepot+1
- Add 10–15% to your total linear footage for offcuts and mistakes.angi+1
- Decide where your joints will fall on long walls (keep them away from very visible spots).lowes+1
2. Acclimate and Pre‑Finish the Boards
- Bring the baseboards into the room for a couple of days so they acclimate to temperature and humidity.[homedepot]
- Lightly sand any rough primer, then apply primer if needed and your first coat of paint; it’s much easier to paint them before installation.lowes+1
- Let them dry fully and lightly sand between coats for a smooth finish.[homedepot]
3. Prep the Room
- Remove old baseboards carefully with a pry bar and putty knife to protect the wall.angi+2
- Scrape off old caulk, then patch and sand any damaged drywall near the floor.angi+1
- Use a stud finder to mark studs along the wall with light pencil lines just above where the new baseboard will sit.thriftdiving+2
- Snap a level reference line if your floors are very uneven so you can keep the top of the baseboard straight.[homedepot]
4. Cut Baseboards to Length
You’ll generally cope inside corners and miter outside corners for the best fit.lowes+1
- Start on the longest wall with a square cut at one end and an inside‑corner detail at the other.thriftdiving+1
- For outside corners, set your miter saw to 45 degrees and cut the two pieces so they meet in a point at the corner.lowes+1
- For inside corners, cut one piece with a simple square end that runs fully into the corner; on the mating piece, cut a 45‑degree miter to expose the profile, then use a coping saw to cut along that profile so it “hooks” over the first board.lowes+1
- On long walls, join two boards with a 30–45 degree scarf joint (two opposing miters) instead of a straight butt joint; this hides the seam better.lowes+1
- Dry‑fit each board against the wall and floor before nailing, making small trimming cuts as needed.thriftdiving+1
5. Attach the Baseboards
- If desired, apply a thin bead of construction adhesive on the back of the board for extra hold, especially on wavy walls or where studs don’t line up.[angi]
- Press the board firmly into place, making sure it sits tight to the floor or follows your reference line.angi+1
- Nail into studs every 12–16 in. along the top half of the baseboard using 1.5–2 in. finish or brad nails.compositecarpentry+3
- Add a few nails near the bottom edge where framing exists behind the drywall to keep the profile tight to the wall.thriftdiving+1
- At corners and scarf joints, add an extra nail or two on each side of the joint so the pieces stay flush.homedepot+1
If you can’t hit a stud, you can still nail into drywall (plus adhesive) for lighter baseboards, but studs give a stronger, longer‑lasting hold.[angi]
6. Fill, Caulk, and Touch Up
- Use wood filler or spackle to fill nail holes and any small chips, then let it dry and sand flush.compositecarpentry+1
- Run a small bead of paintable caulk along the top edge of the baseboard where it meets the wall and at inside and outside corners; smooth with a damp finger for a neat line.handymanconnection+2
- Caulk any tiny gaps at scarf joints and where the baseboard meets slightly uneven floors.angi+1
- Once the caulk has skinned over, apply your final coat of paint to the baseboard and touch up nearby wall paint as needed.lowes+1
7. Special Notes for Carpeted Rooms
- Baseboards usually go on before carpet; if you’re replacing in an existing carpeted room, gently pull the carpet edge back just enough to work and reinstall it under the new baseboard.jbrownpainting+1
- The baseboard helps hide the tack strip and carpet edge and protects the wall from vacuums.handymanconnection+1
We hope this general guide to replacing or installing baseboards is helpful. At first, this can seem like a big job, and it can be, but if you look at some of the links and focus on going step by step, room by room a DIY baseboard job is well within most people’s reach if they want to put in the time and effort.