Sealing Your Driveway: Attack Issues Now To Prevent Further Damage!
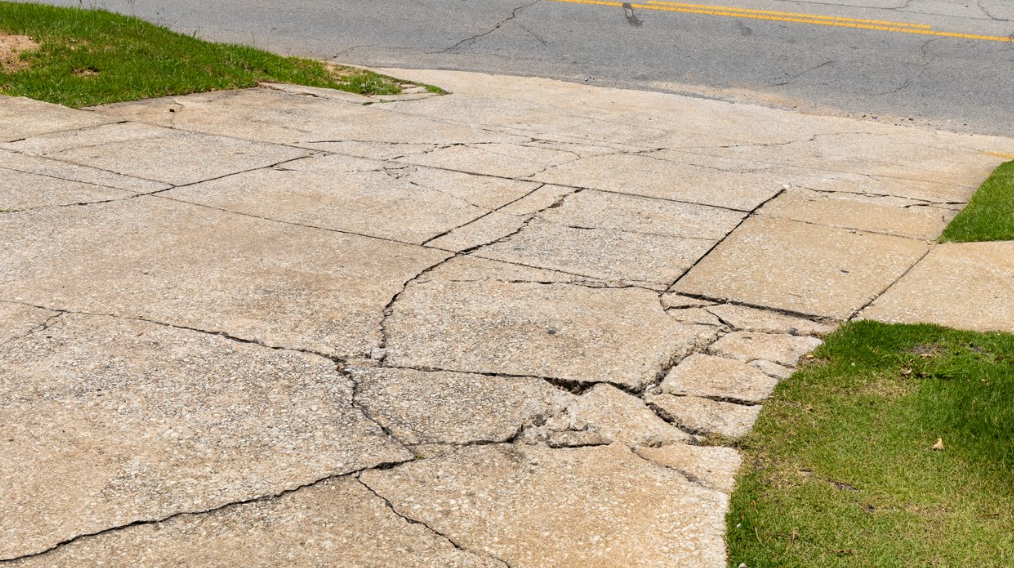
Your driveway is more than just a parking spot—it’s the welcome mat to your home. But when cracks start creeping in, they can quickly turn from cosmetic nuisances to costly repairs. Whether you’re dealing with hairline fractures or gaping crevices, sealing those cracks early is the key to preserving your curb appeal and preventing long-term damage.
Here’s your go-to guide for sealing driveway cracks like a pro:
Step 1: Know Your Enemy—Types of Cracks
Before you grab the caulk gun, identify what you’re working with:
- Hairline Cracks: Thin and shallow, often caused by shrinkage or minor settling.
- Medium Cracks (¼”–½”): These need flexible fillers to accommodate expansion.
- Large Cracks (>½”): May require backer rods and heavy-duty sealants.
- Alligator Cracks: A network of interconnected cracks—usually a sign of deeper structural issues.
Step 2: Prep Like a Pro
Cleanliness is key. A dirty crack won’t bond well with sealant.
- Use a wire brush or pressure washer to remove dirt, debris, and loose material.
- Let the area dry completely—moisture is the enemy of adhesion.
- For deep cracks, use a leaf blower or compressed air to clear out hidden dust.
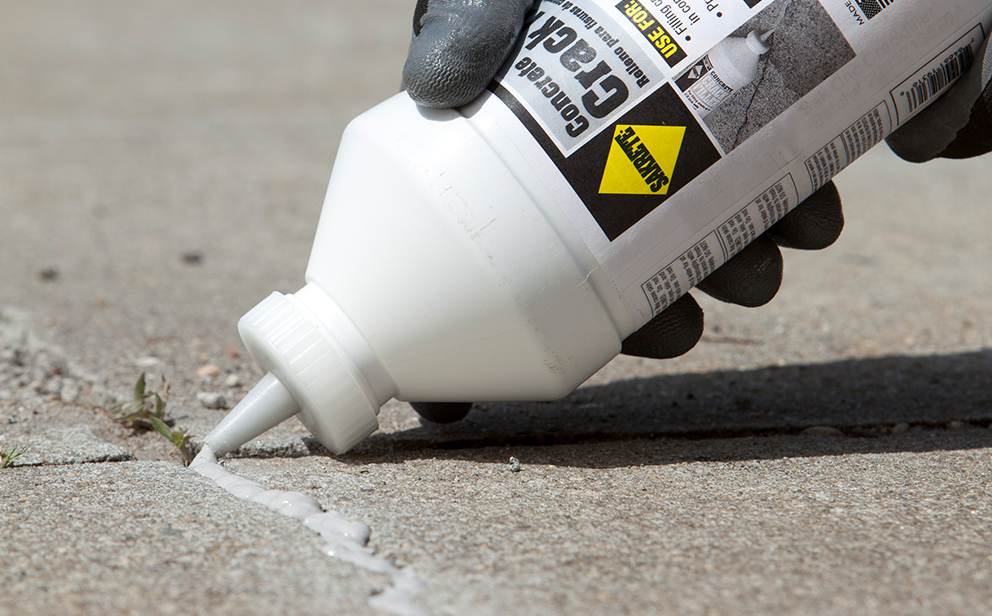
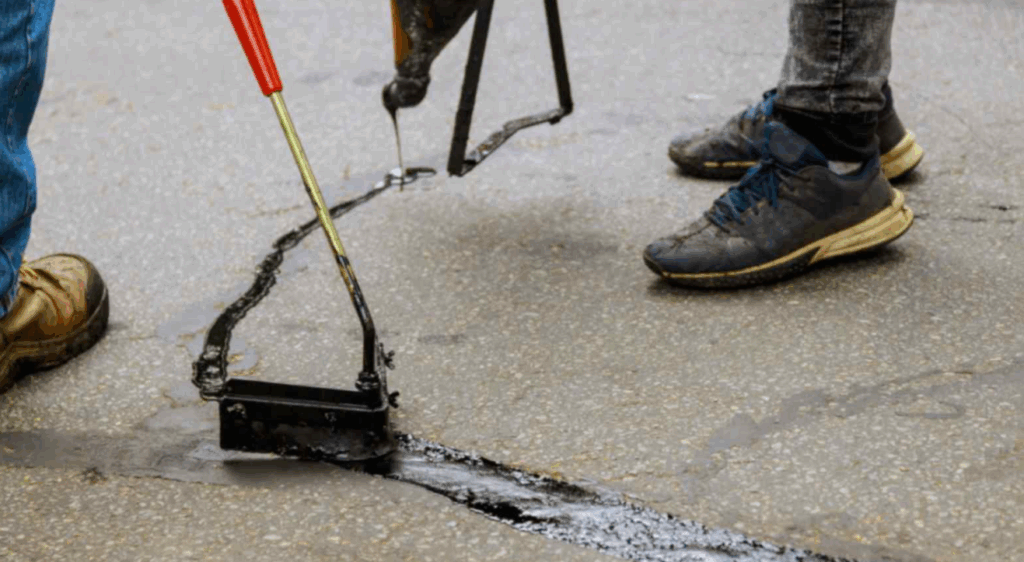
Step 3: Choose Your Weapon—Sealant Options
Different cracks call for different solutions:
| Crack Size | Recommended Product | Notes |
|---|---|---|
| Hairline | Liquid crack filler | Self-leveling and easy to apply |
| Medium | Asphalt or concrete crack sealant | Comes in tubes or pourable jugs |
| Large | Backer rod + polyurethane sealant | Flexible and durable |
| Alligator | Cold patch or resurfacer | May require professional repair |
Sources:
Step 4: Apply with Precision
- For pourable fillers, slowly pour into the crack and smooth with a squeegee.
- For tube sealants, use a caulk gun and apply in a steady bead.
- For large cracks, insert a backer rod first, then seal over it.
- Feather the edges with a trowel for a clean finish.
Pro tip: Work in the shade to prevent premature drying and cracking.
Step 5: Cure and Protect
- Allow sealant to cure per manufacturer instructions—usually 24–48 hours.
- Keep vehicles and foot traffic off the area during curing.
- Consider applying a driveway sealer over the entire surface for added protection.
Bonus Tips to Prevent Future Cracks
- Ensure proper drainage—standing water weakens driveways.
- Avoid heavy loads on edges where support is weakest.
- Reseal your driveway every 2–3 years to maintain elasticity and water resistance.
Cracks may be inevitable, but damage doesn’t have to be. With a little elbow grease and the right materials, you can keep your driveway looking sharp and structurally sound. Think of it as driveway first aid—with long-term benefits. At Edwards Enterprises we’d be glad to help you out.