How to Install Your Own Recessed Lights
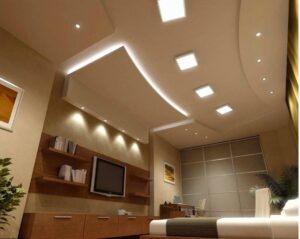
Recessed lighting is an effective way to bring function and ambiance to your home. Here is a guide to the installation process.
| Materials Needed for the Project
|
|||
| Light Fixtures | Bulbs | ||
| Drill | Drill bits | ||
| Hole cutting drill attachment | Stud Finder | ||
| Drywall saw | Safety glasses | ||
| Voltage tester | Wire stripper | ||
| Junction box | Dimmer Switch | ||
| Electrical wire | Electrical tape | ||
- Cut Hole in Ceiling
- Use the stud finder to assure the holes do not overlap a joist.
- Mark where you desire to place the lights.
- Use the template provided with the light to draw a circle on the ceiling.
- Cut the holes with a drywall saw, at all the marked locations.
- Be sure not to snag any wires that may be in the ceiling cavity.
- Rough In The Wiring
- Run cable from the power source to a switch box.
- Then run to the first hole, allowing at least 16 inches of extra cable to make wiring easy.
- Use a drill with a long drill bit to avoid cutting additional access holes that will need patching later.
- Wire the Light
- Open the junction box for the lights.
- Run cable into the box and clamp it.
- Strip insulation and make wire splices, black to black, white to white, and ground to ground.
- Fold the wires into the box and replace the cover.
- Mount the Light
- There are usually four clips that clamp the can to the ceiling by pushing down on top of the drywall.
- Be sure to pull the clips in so they do not protrude outside the can.
- Slip the box into the hole, then push the body up into the hole until its flange is tight to the ceiling.
- With your thumb, push each clip up and outward until it clicks and clamps the light fixture.
- Add the Trim
- Most trims are mounted with coil springs or squeezable rod springs. If you have coil springs, hook each spring to its assigned hole inside the can.
- Pull out each spring and hook it to the trim, and then carefully guide the trim into position.
- If you have rod springs, squeeze and insert both ends of each spring into their assigned holes.
- Push the trim up into position.
Naturally, another option is to approach a professional to take care of the lights for you. If you’d like to pursue this option, please don’t hesitate to contact us. Feel free to read about our recessed light installations here on our website.
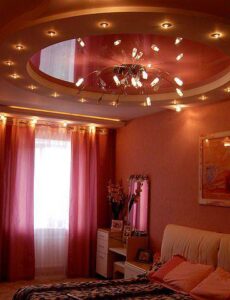
Once the project is complete, the lighting will be as bright as you need, or as subtle and romantic as you would like. So enjoy the benefits and relax in your new surroundings!
About Edward’s Enterprises
“Edward’s Enterprises’ mission is to be responsive and efficient while providing our clients with quality remodeling and repair services by cultivating a knowledgeable, professional, and prepared team in the office and the field.” We are your destination for residential & commercial renovations, remodeling, & repairs by providing quality & affordable service.
Edward’s provides handyman and property maintenance services to professional and retail facilities throughout Ventura, Santa Barbara and North Los Angeles Counties. These services include plumbing and electrical maintenance, ceiling grid and lighting repair and installation, office clean outs, door repairs, cubical and furniture assembly, facilities maintenance, rental property maintenance and move out services, slider, window and screen repairs and many other services.
Our residential customers come to us for landscape repair and planting, sprinkler and outdoor lighting repairs, junk and green waste removal, pressure washing, rain gutter cleaning, facia and trim repairs and wood deck and patio cover repairs.
Our indoor services include kitchen, bathroom and living space remodels, drywall repair, house painting, plumbing service and repair, lighting and electrical repair and installation, kitchen hood replacement and repairs, carpentry, wallpaper removal and many other home handyman services.