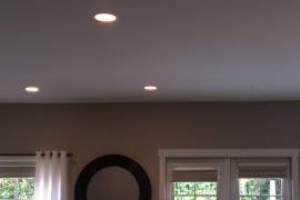
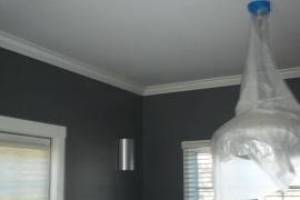
Edward's Enterprises team performs many moulding & trim installations in Woodland Hills such as:
-
Baseboard installations
-
Casing repairs
-
Crown moulding installed
-
Chair rail put up & painted
-
Quarter round repaired
-
Window trim replaced
-
Vinyl Cove Base
-
Wainscoting installs & painting
-
Bead board accents installed
-
Paneling replaced or painted
-
Mobile home trim work upgraded
-
Exterior siding trim removed & repaired
Edward's Enterprises Moulding & Trim service can install base, crown, chair, stop, case & more in your home. New or old, moulding & trim can transform your home.
Wondering if we can assist you with your base board replacement? Call our team to explain your moulding or trim repair project!
- Handy Tips
- Did You Know?
- Other Work
- DIY FAQs
There are three basic types of moulding. These include base moulding, chair rail, & crown moulding. In order to choose & decide which one you would like, you must first have a basic understanding of the most common types.
Base Moulding is installed along the lower portion of a wall & can serve as a decorative transition from the floor material & the wall itself. This type of moulding can come in several different widths. It is important to choose the right width because if it is too wide it could draw the eyes downward, however; if it is to narrow it may create an uneven feel.
Chair rail moulding is very practical because it protects the wall it is attached to from collisions due to rogue dining chairs. Chair rail moulding is reserved for use in dining rooms & can also create a visual barrier for contrasting wall coverings. When installing this last & final type of moulding mentioned, it's always a good idea to install it at about 1/4 of the room's height, overall.
Crown moulding is usually used for decorative purposes & serves as a junction between the wall & ceiling. This type of moulding is ideal for ceiling installation due to its lightweight & solid, stable construction. With crown moulding, it is possible & highly desired to layer the mouldings on top of one another to create a unique finished effect.
Molding, Trim & Baseboards
Home finishing needs to be done right. & the role that baseboards in your home, connecting all walls & their flooring, plays, cannot be overstated. Nor can the window & door trims as they further add their value. In fact, neither can the crown molding, which you get placed right up on the ceiling. All these aspects attribute worth to your home.
A Few Material Types to Consider
Solid wood, here, would be the very first to note : It is both the most visually stunning & natural option, all in all. But you can also get jointed pine as another option, offering great assistance in the form of a baseboard, a trim or even molding. Then there is also medium density fiberboard, which some more plainly prefer to call MDF, respectively.
Design Options
All of these materials just mentioned will, of course, add to the design of the home – so choose wisely which one you wish to lay down, & know that it will affect the look of the house a bit, even if it's by the ground area it'll still be a difference to note. & did you know using the right PVC, as well, can definitely affect your home's internal design – layout look overall? Yes, PVC's not just for plumbing.
Efficiency
These materials discussed, in addition to tropical woods, are immensely effective. See countless pictures of all these online, to get a visual of what they can do when they're in your home.
Budget
Appx. $25-$700
Do you cut in before or after rolling?
It is best to cut in corners on moulding before rolling paint onto the main surfaces. Use a medium size paint brush.
FAQ Source
Should baseboards match the floor?
Baseboards do not need to match the floor if you don't like the look. Take a look at different sample moulding and/or flooring, & see for yourself which combinations work best.
FAQ Source

 We charge for all time included in a customer's project, including purchasing or delivering materials, & offsite work like painting trim prior to an installation, or for the time to haul away debris. This allows us to take on smaller projects for our moulding customers, rather than only lump sum projects with much higher minimums to show up.


 Most projects get a 3 hour window of arrival, so expect something like 7am to 10am, or 10am to 1pm, or even 12pm to 3pm window.