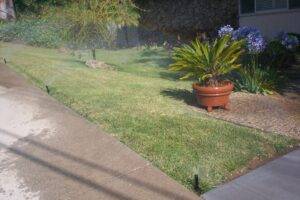
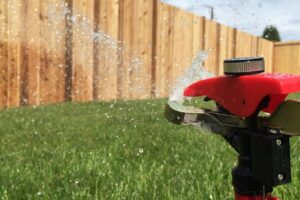
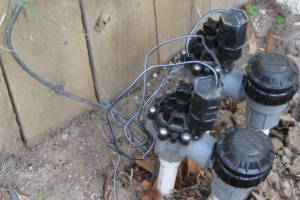
Regarding sprinklers & drip systems, Edward's Enterprises can help our Carpinteria customers with:
-
System repairs (piping, heads, wiring)
-
Installing new sprinkler systems
-
Over ground drip tubing repairs
-
Drip emitter & mister line replacement
-
Adjustments to pop-up heads & bubblers
-
Water backflow control installs
-
Punch-in 1/4 drip lines
-
Relocation of sprinkler heads
-
Irrigation design to fit your lawn
-
PVC pipe & fitting repairs
-
Palm frond piles taken away
-
Timers adjusted or fine-tuned
-
Manual control valves repaired
-
Fertilizer injector installed
-
Timer synched across lawn spaces
-
Valve, head & system leaks
The right watering system can go a long way towards ensuring your green thumb efforts. Sprinklers are a practical, attractive addition to landscapes across the country. Arranged well, they bring life to many lawns. Their systems provide essential water & timers with the convenience of not having to manually spray water ourselves. When adding or renovating a sprinkler system, pay attention to your landscaping. This includes your plants & flowers–it would be a waste to spray more water on flowers than on high water-need shrubs! Don't skimp on preparation & you'll enjoy your sprinkler system for years to come!
We want to talk with you about your front walk sprinkler repair ideas. Try us by phone to go over the details of your drip system conversion or sprinkler system removal plans!
- Handy Tips
- Did You Know?
- Other Work
- DIY FAQs
Many people would like to know what are the components to an automatic sprinkler system. A typical system includes a controller, valves & sprinklers. The controller is basically the brains of the operation. The valves open & close to release & stop the flow of water from the underground pipes. The sprinklers distribute water to specific areas. These are simply the basics because the system can also include rain shut off devices, soil moisture sensors & drip irrigation zones. An autmatic set of sprinklers, you will find, are usually synchronizable or 'timed' according to a regular schedule, & your need.
A question that is often asked is will an automatic sprinkler system water as evenly & use more water than if done by hand? The answer is yes & no. Yes, the sprinkler system will water as evenly & No the system will not use more water. Sprinkler systems are designed based on your Landscapes diverse watering needs & are custom to your particular situation. This means that they are set up to water every part of your lawn evenly. These systems will save water at the same time because they only water where it is needed & are designed to apply water exactly where it needs to go. & even in the event of unexpected rain, you can still allow for adjustments, as well, turning off the next scheduled irrigation to avoid overwatering. The options are many, here, with automatic systems like these.
Keeping your drip system in proper working order may take some periodic maintenance to save water & keep plants & trees properly watered. It is important to periodically check your system for any leaks or ware in the drip tubing. Carefully inspect all drip emitters, sprayers & bubblers to check for any clogs. If you do find any clogs, make sure to clean out those areas if possible, or replace them if need be.
Also make sure to check the filter screen each week for the first month for any build up of debris. To clean the screen, use a soft nylon brush & water. Next, check to see if any of the drip tubing is strained or has been moved, as well as, look for nicks & cuts. These sections can be replaced using couplings.
A few times a year you should do a complete flush of your drip system. This will help flush out any excess minerals that have built up over the year.
A commonly asked question is how much water will be saved using drip systems as compared to sprinkler? The answer is that you can expect to save up to 50% of the water used. Sprinklers tend to throw water & so there is a greater loss of water due to evaporation & overspray. Drip systems solve the problem by delivering water slowly & under control to precise areas at the roots. This makes it so runoff, erosion, overspray & evaporation do not occur.
Why is my sprinkler not rotating?
The main reasons why a sprinkler might not be rotating or has a decreased water flow have low water quality that'll force particles into the gear drive, age, & excessive pressure.
FAQ Source
How do you fix a sprinkler that won't rotate?
The steps to repairing a non-rotating sprinkler are disassembling the sprinkler head, taking off the filter at the bottom of the head, rinse the filter to remove debris, or doesn't work then replace the sprinkler head, then re-install the old or install the new sprinkler & test.
FAQ Source

 We charge for the time needed for a client's project, including providing or delivering materials or for the time to haul away left over trash. This allows us to handle small jobs for our landscape customers, rather than only lump sum projects with much higher minimums to show up.


 Most backyard gardening projects get a 3 hour window of arrival, so expect something like 7:00am to 10:00am, or 10:00am to 1:00pm, or even 12:00pm to 3:00pm window.